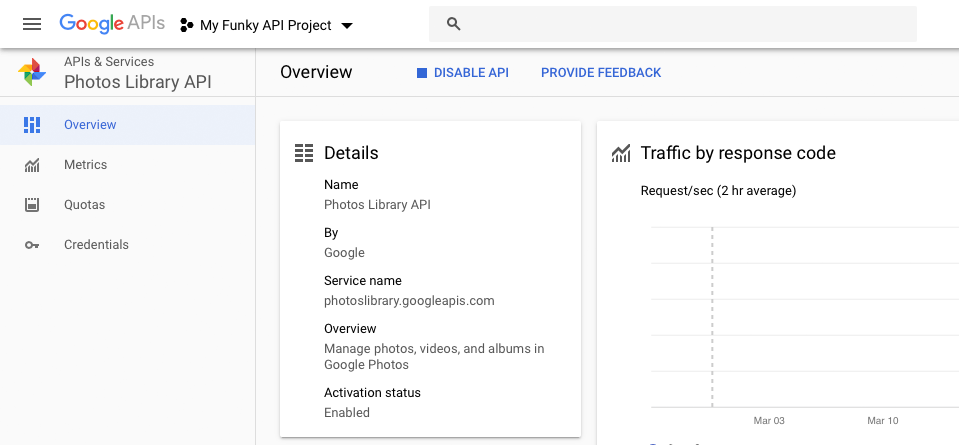
Steps to Get Google API Credentials
The following steps are required to create a client id and a client secret to get Google Photos Pro plugin working on your site:
- Create a Google Project
- Creat a credentials / client id and client secret
- Enable Google Photos API for Project
1. Create a Google Project
If you do not have a Google API project set up in the API Manager, please follow these steps:
1. When you log into the API Manager, you should see a screen similar to this:
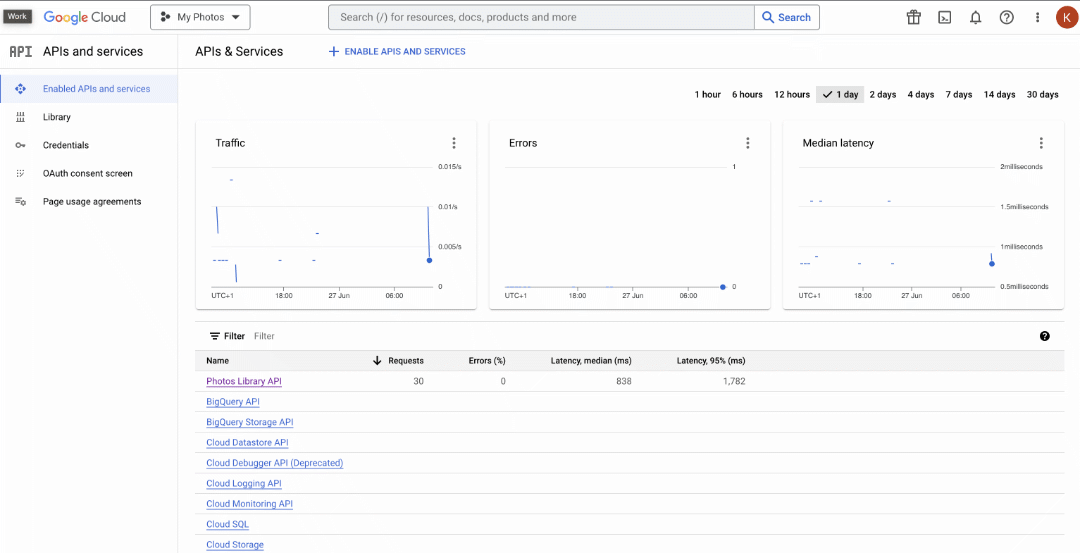
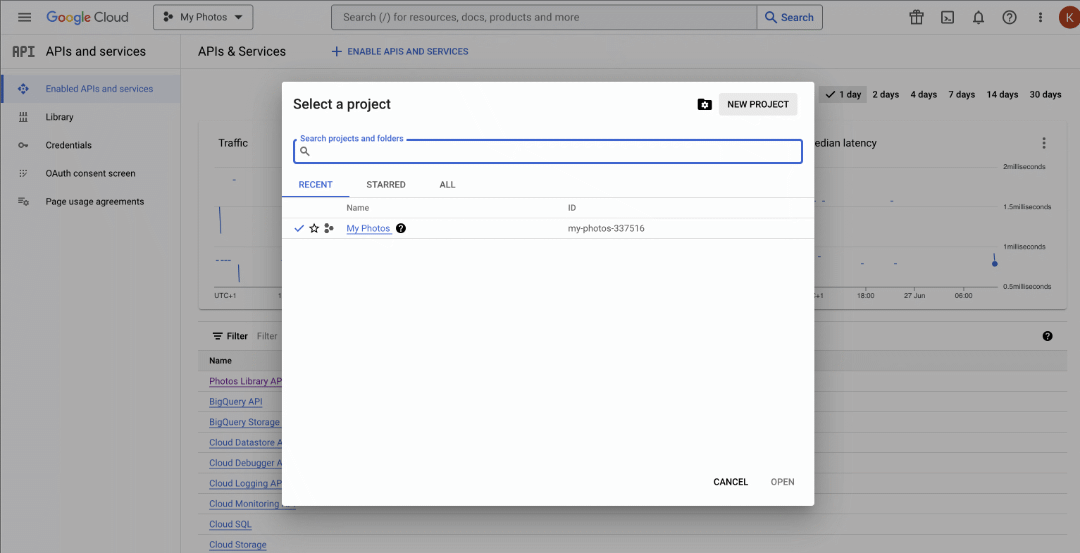
2. Click on Project Name Drop down and choose an existing project or click ‘New Project’
If this is your first Project, you may be required to Configure OAuth Consent Screen.
For User Type – select External
App Information
App Name – Name you app e.g. GPP Plugin
User Support Email – is your email address
App Domain
Application Homepage – is your website domain
Authorised Domain -is your website domain
Developer Contact – is your email address
Scopes
Don’t need to do anything
Test Users
Don’t need to do anything
IMPORTANT – Publish App !!!
Once you have configured OAuth Consent Screen – go back into settings and click Publish App
2. Creat a credentials / client id and client secret
1. Creating a Client ID and Secret (these are what you need to enter into the plugin)
Go to the API Manager , select your project and click ‘Credentials’ click ‘Create Credentials’, select ‘Oauth client ID’
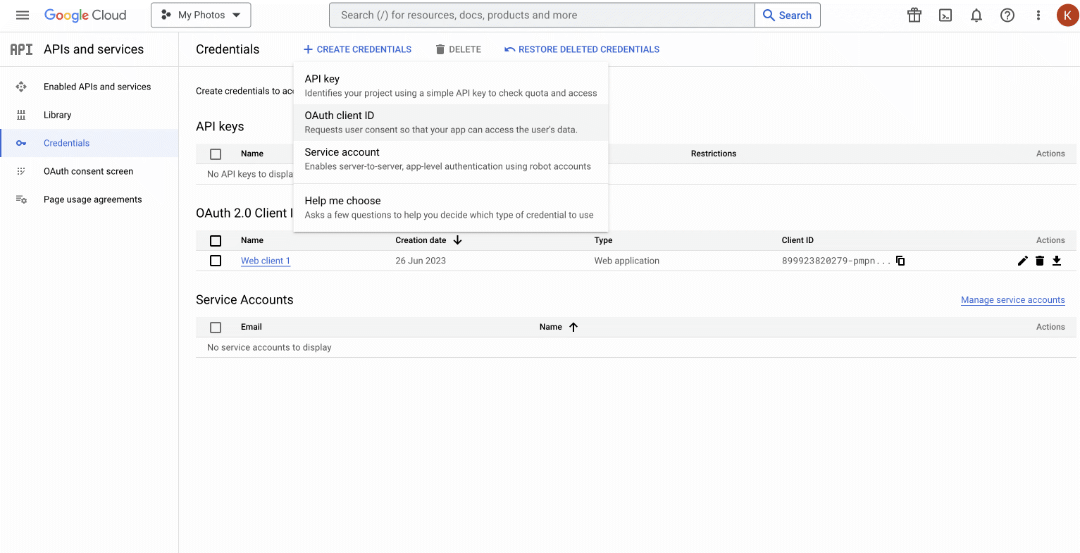
2. Application Type ‘Web application’ – Give it a name, and the Authorised redirect URI(this is found in the plugin credentials page), Click Create
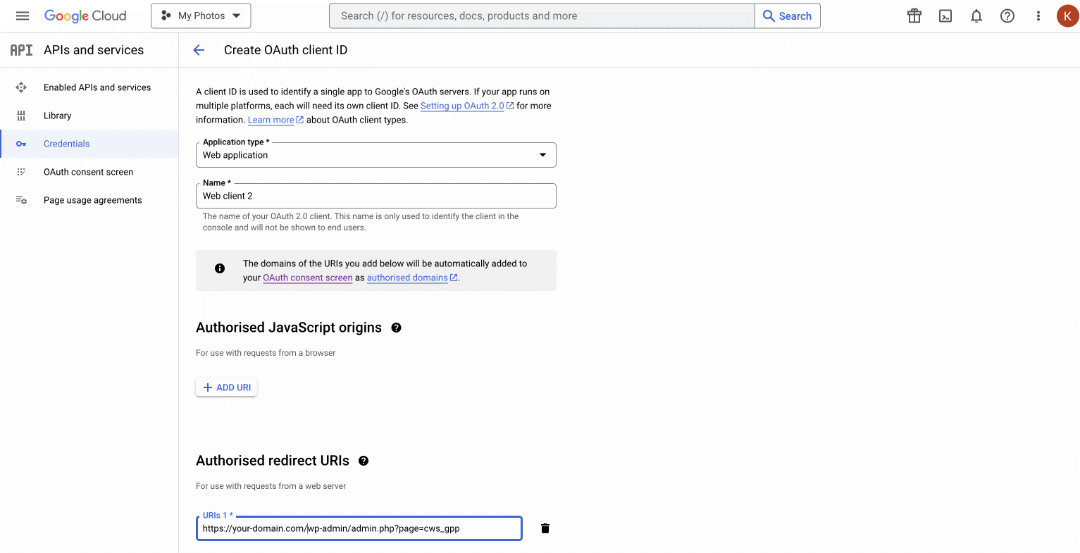
3. Copy and paste client ID and client Secret (Google Photos Plugin -> API Credentials page)
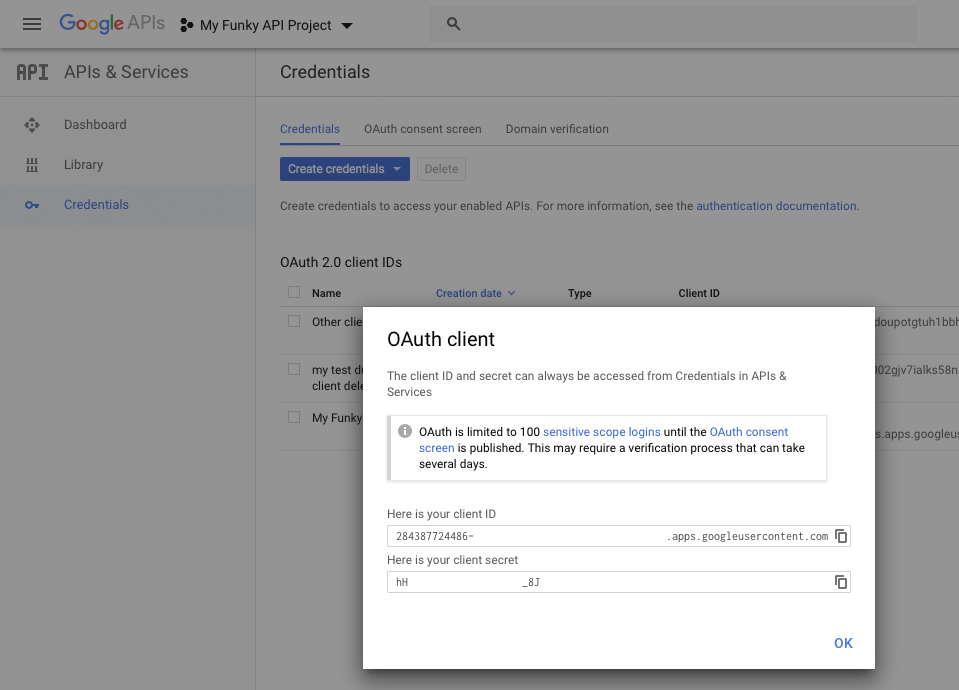
3. Enable Google Photos API for Project
Navigate to the Dashboard of your API Manager and select your API project.
Enter “photos library api” in the Search box. The “Photos Library API” will now show up. Click on it
If it is not already enabled, click ‘Enable’
